In this article, we are going to see how to use dstack.ai for creating ML apps. I have taken the loan prediction dataset. This particular loan prediction app helps predict whether the customer should be given a loan or not based on different parameters. It’s a classification based problem and gives the output as Yes/No(1/0).
dstack.ai is a python framework to create AI and ML apps without writing any frontend code. Before we get started I am assuming that you have installed dstack server on your system and it is running. You can start the server by the following command. If you wish to change the port you can do that also.
dstack server start --port 8081Let’s get started now.
We are going to use the loan prediction dataset and deploy it on dstack.
Importing some libraries along with dstack and dstack controls
import dstack as ds
import plotly.express as px
import matplotlib.pyplot as plt
import pandas as pd
import numpy as np
import dstack.controls as ctr
Functions to get the train and test data. The ds.cache() is used to quickly retrieve the data and not load it everytime we run the program
@ds.cache()
def get_data():
    data= pd.read_csv("D:\\ML_projects\\dstack_proj\\train_ctrUa4K.csv")
    return data@ds.cache()
def get_testdata():
    return pd.read_csv("D:\\ML_projects\\dstack_proj\\test_lAUu6dG.csv")
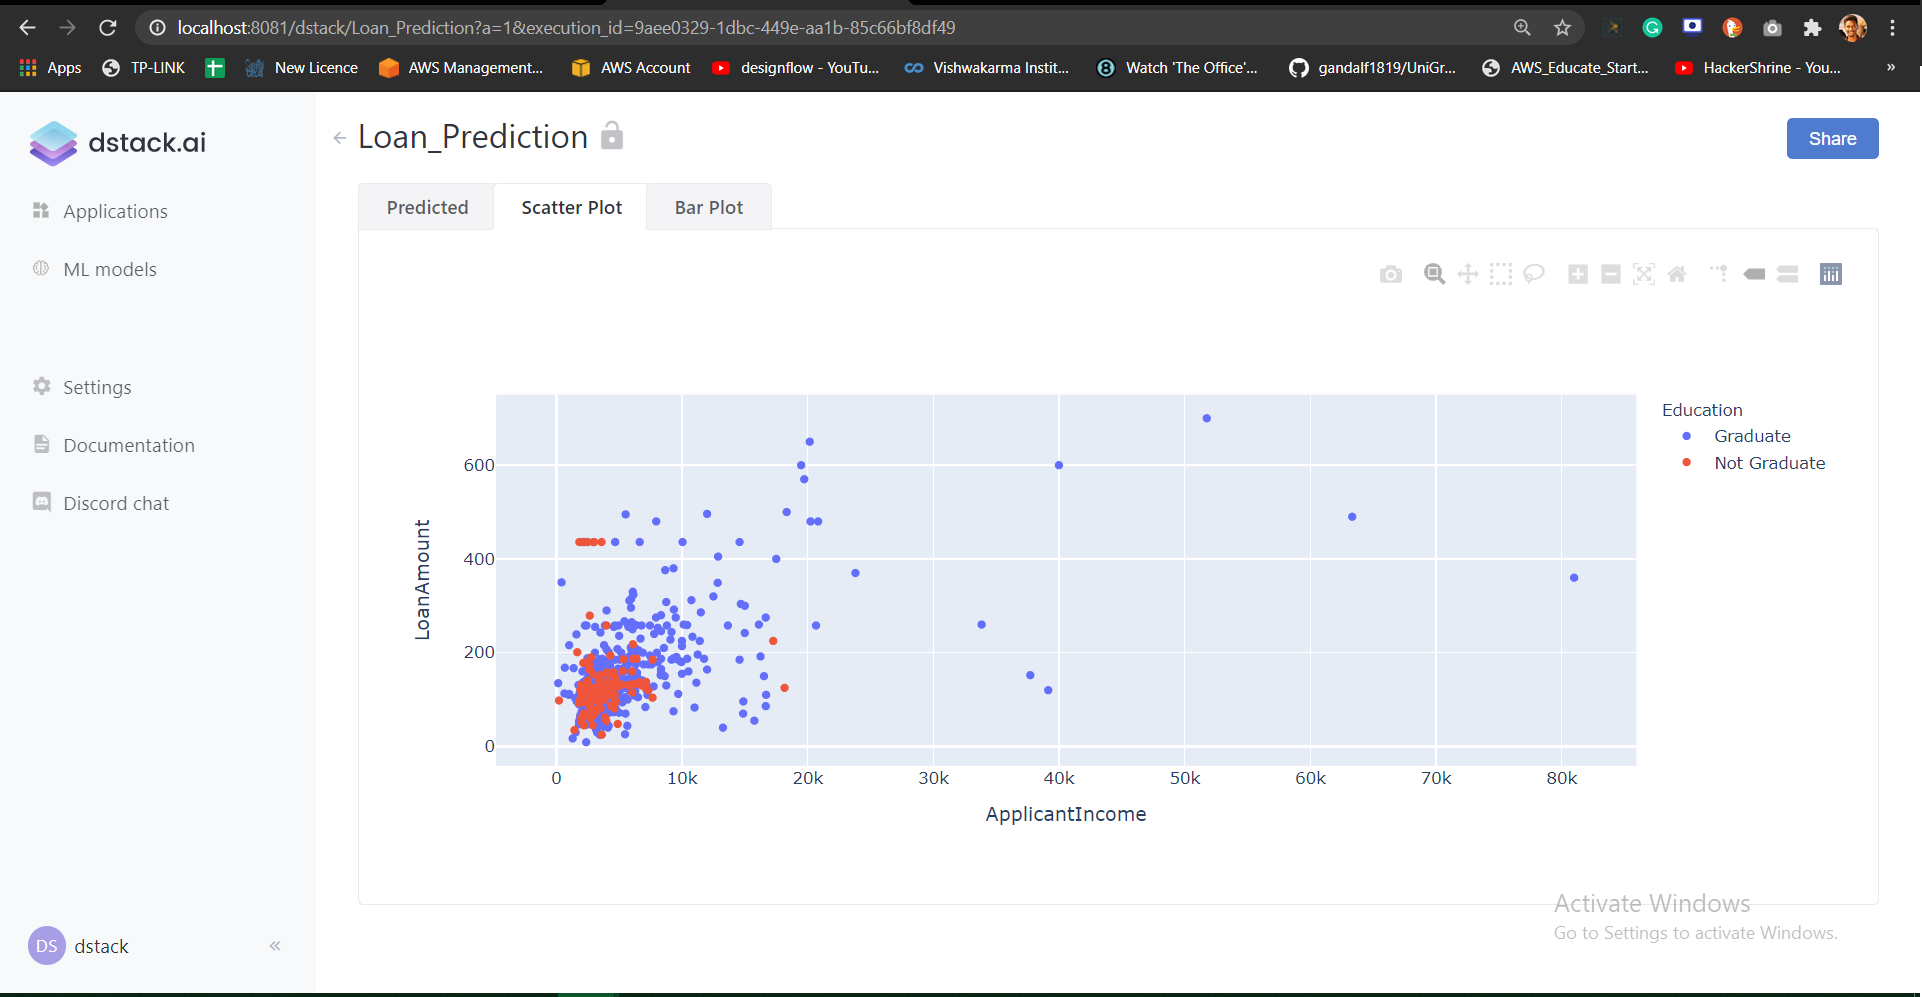
We are going to make 3 ds.apps viz Predicted, Scatter plot and bar plot and then put them on a frame as tabs for user to access(see below image).

First, we look at the plot and then later on the ML part. Let’s create 2 functions scatter_handler and bar_handler.
def scatter_handler():
     df = get_data()
     return px.scatter(df, x="ApplicantIncome", y="LoanAmount", color="Education")def bar_handler():
     df = get_data()
     return px.bar(df, x="Gender", y="Loan_Amount_Term",  color="Education", barmode="group")
These two functions return the scatter and bar plot respectively from plotly.express library
Now, we need to add these as tabs on a frame. To do this, we create a frame first. You can see the frame on the dashboard image above.
frame = ds.frame(“Loan_Prediction”)Once this is done, we add the functions as apps on the frame.
frame.add(ds.app(scatter_handler), params={“Scatter Plot”: ds.tab()})frame.add(ds.app(bar_handler), params={“Bar Plot”: ds.tab()})We pass function created to the ds.app function as a parameter and mention it as a tab.
Then we push the frame to the dstack application.
url = frame.push()
print(url)
When you run your application you can view your dstack app now.
Let’s look at the ML part with dstack
train_data = get_data()
y = train_data.iloc[:,-1]
train_data = train_data.drop(['Loan_ID','Loan_Status'],axis=1)
test_data = get_testdata()
ids = test_data.iloc[:,0]
test_data = test_data.drop(['Loan_ID'],axis=1)def encoding(data):
     data = pd.get_dummies(data, columns=["Gender","Married","Education","Self_Employed","Property_Area"],drop_first=True)     return data
train = encoding(train_data)
test = encoding(test_data)
We get the training and testing data and separate the output from the training data. Then we do encoding to convert our categorical into numerical values. This is a simple pre-processing of the data, make sure you do all the necessary steps before using any ML model on the data.
from sklearn.ensemble import RandomForestClassifier
random = RandomForestClassifier()
random.fit(train,y)
We are training a simple random forest algorithm from the sklearn.
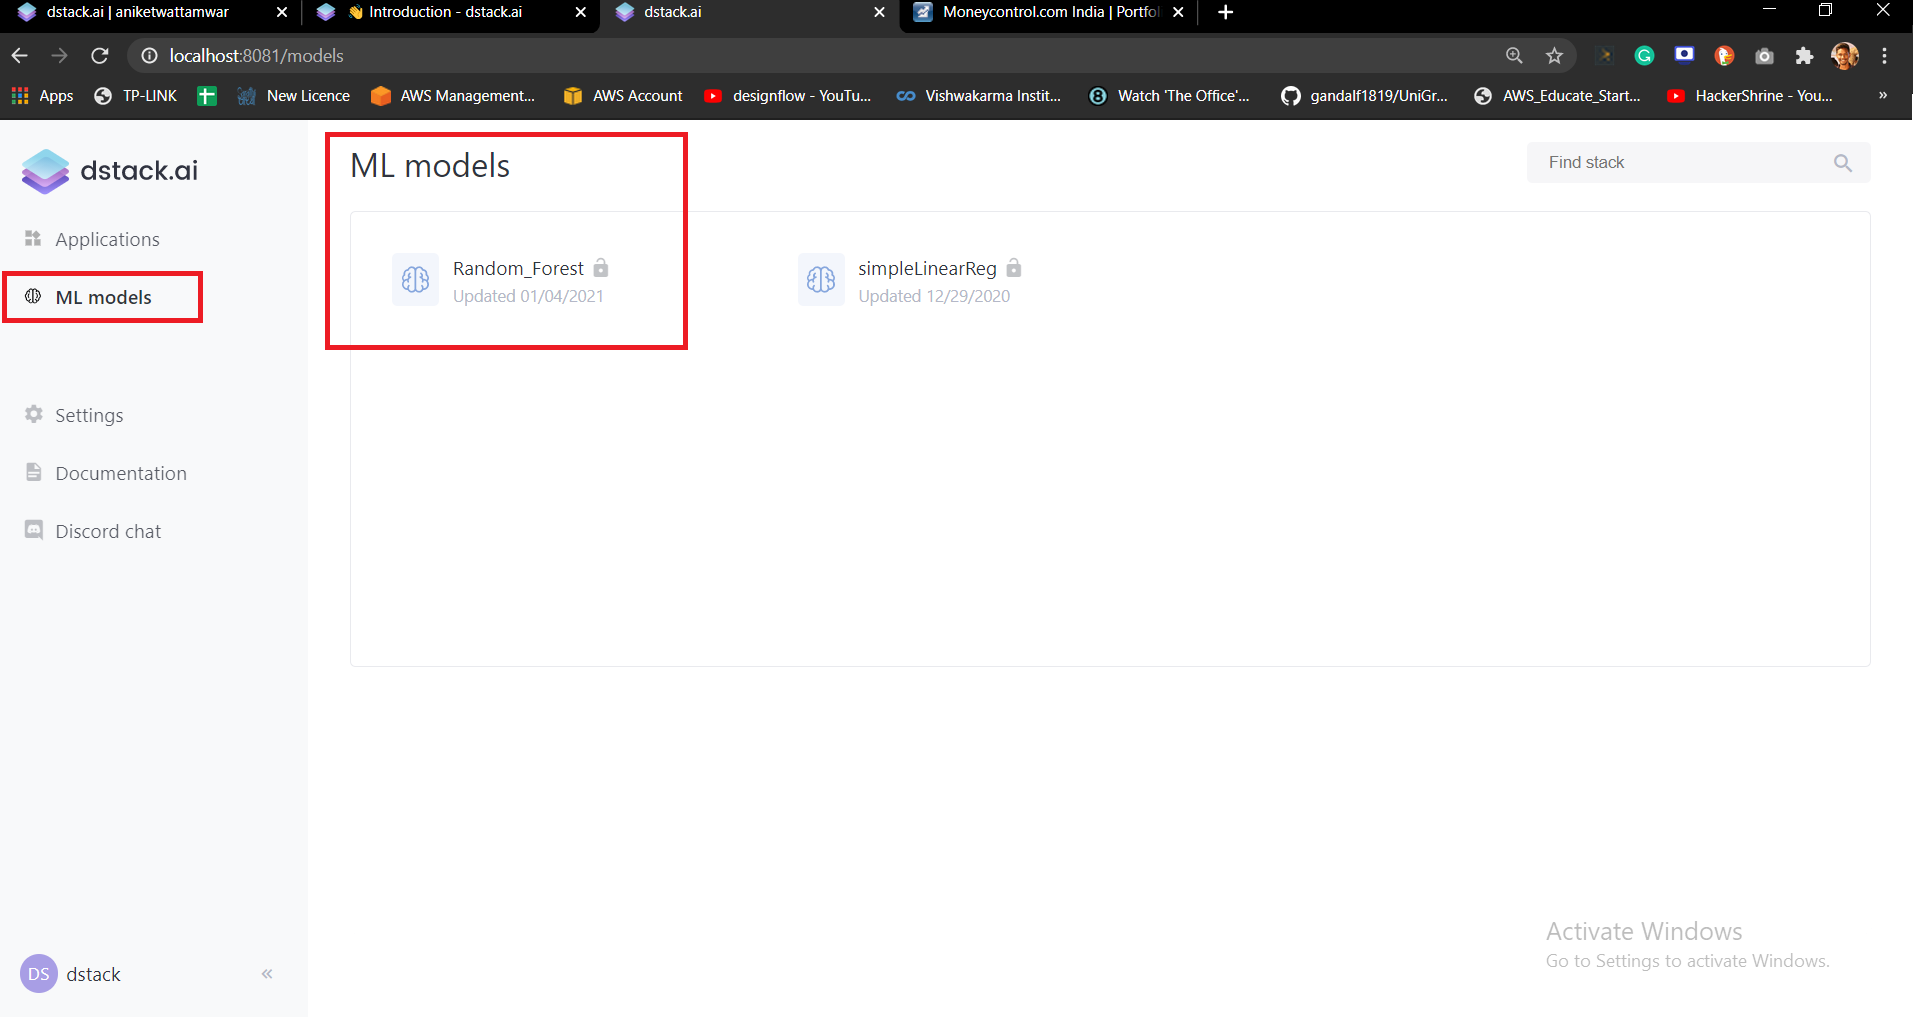
ds.push("Random_Forest", random, "Random Forest Loan Prediction")Once the model is trained, you will have to push to the dstack application. It will look like this.

This is where all your models will be stored and you can use it. To use the model you will have to pull it.
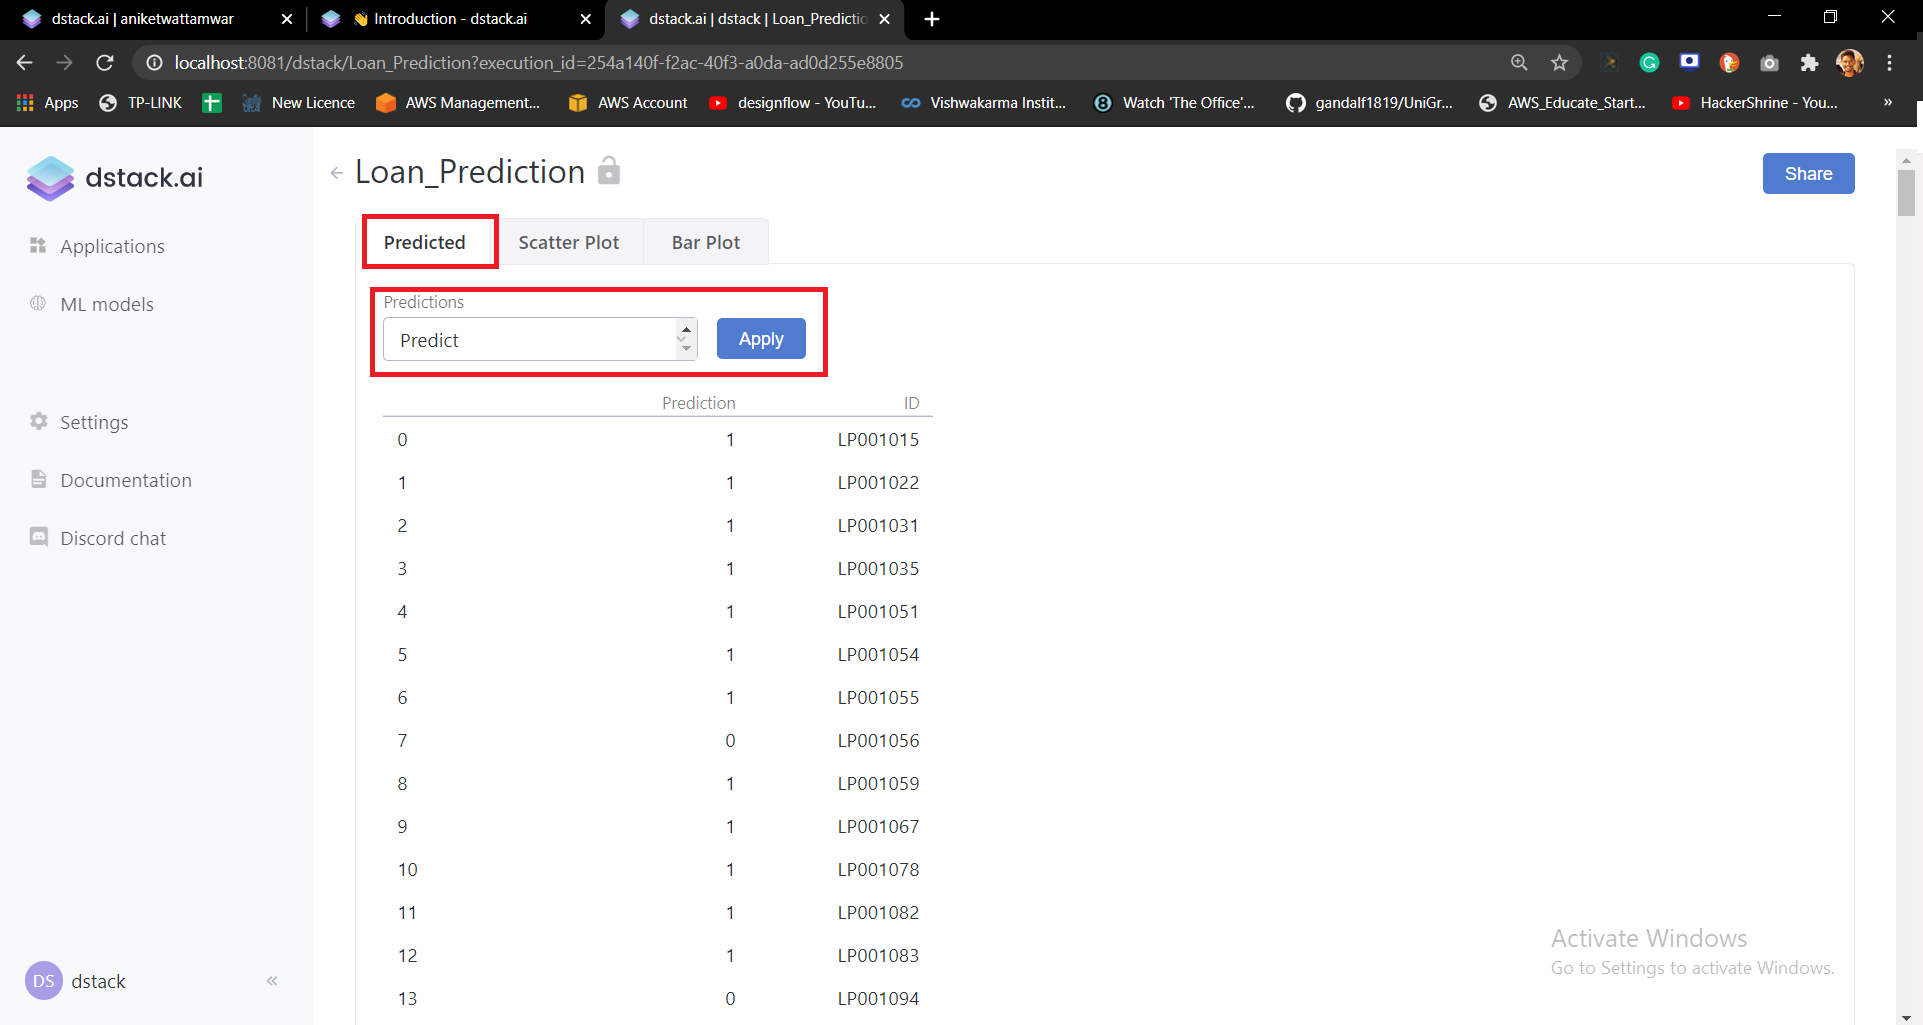
model = ds.pull('/dstack/Random_Forest')Once you have pulled it now you can use it to predict on your test data. We are going to create dropdown called as Combobox in dstack and it will contain one value called as ‘Predict’.
values = ctrl.ComboBox(data=['Predict'],label="Predictions",require_apply=True)Create a function to predict the model on the test data.
def get_predicted(values: ctrl.ComboBox):
     y_pred = model.predict(test)
     y_pred = pd.DataFrame(y_pred)
     y_pred = y_pred.rename(columns={0:'Prediction'})
     y_pred['ID'] = ids
     return y_pred
We have to now create an app and add the function to the frame as a tab.
p_app = ds.app(get_predicted, values = values)
frame.add(p_app, params={"Predicted": ds.tab()})url = frame.push()
print(url)
That’s it. When you run the application now it will show you the Predicted tab. When you click on Apply it will show you the predicted values with the loan status.

Deploying your app on dstack.cloud
You can also deploy your app on dstack.cloud. The following steps will help you to do so (You must have an account on dstack.cloud).
- Go to C:/Users/<your-account>/.dstack
- In this folder, open the config.yaml file in notepad and add the following.
---
profiles:
  default:
    user: <user-name>
    token: <token-number>
server: https://dstack.cloud/api- Make sure you put your username and token number from your dstack.cloud account settings tab.
- Save the file
- Go back to your code
- In code, go to the part where you wrote ds.pull() and add your username in this function.
model = ds.pull('/aniketwattamwar/Random_Forest')- Once this is done, just run your python file(Do not locally start your server now)
- You can now share the App link to anyone. Click on the below link to open the dstack app.
Here is the documentation link on dstack.cloud
You can find the code on my Github: https://github.com/aniketwattamwar/Create-ML-apps-using-dstack.ai
Hope this helps.
Peace.
Leave a Reply